::: tip Prerequisites
To follow along with this tutorial, you will need to register with Speckle and install the required connectors 🔌. It takes less than 3 minutes!
For a comprehensive overview of this connector, check our docs 📚!
:::
Introduction
Blender is a super powerful 3D modelling software that can have pretty neat AEC applications. Plus, it's totally open source - just like Speckle 😏
The Speckle Connector for Blender is still a work in progress, but it is still totally useful for most geometry and for custom properties.
If you'd rather watch than read, have a look at this quick video which will show you everything we'll be going over in this post.
Installing the connector

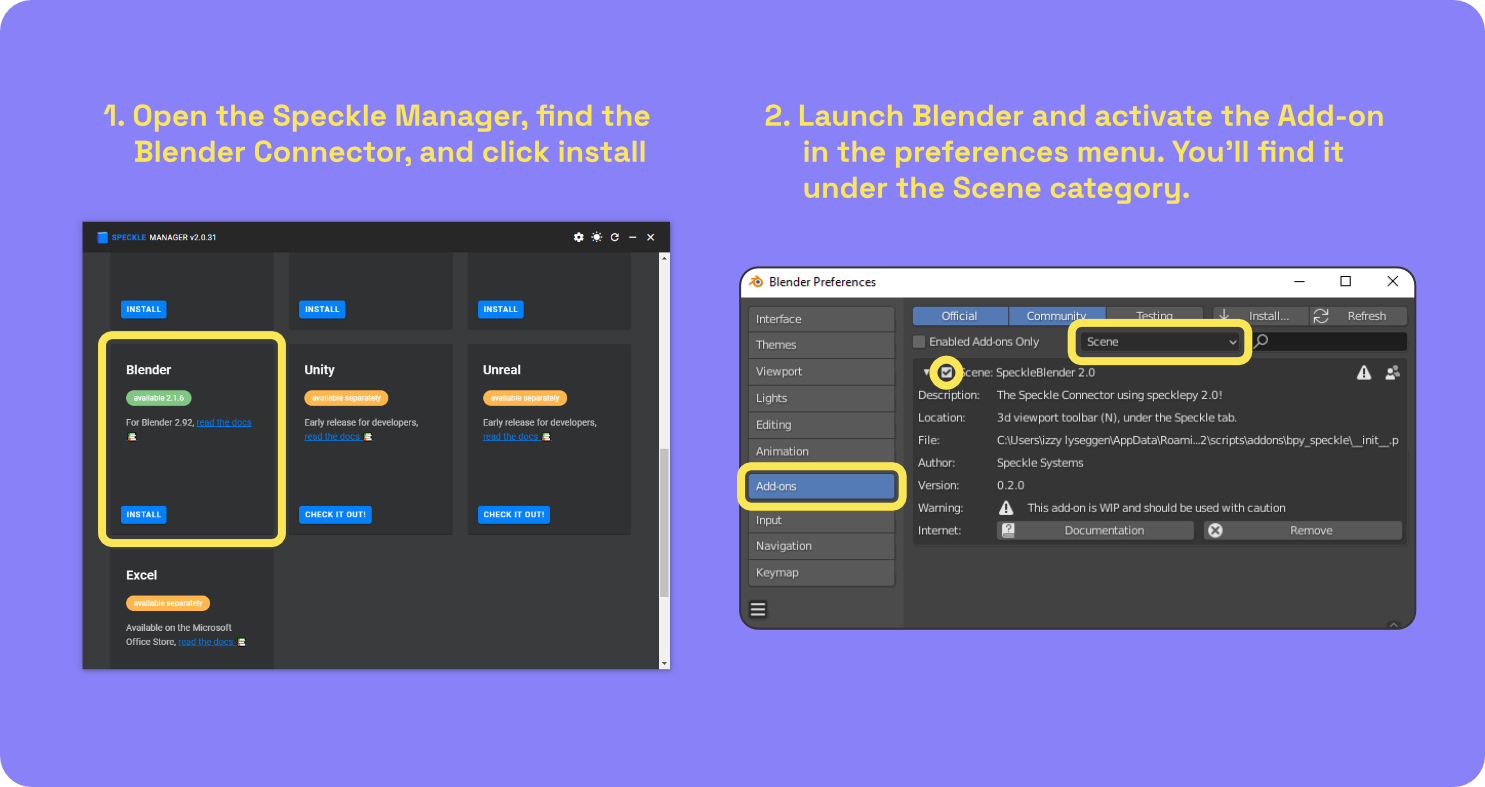
You can install the connector directly from the Speckle Manager. Just find it in the list of connectors and click "Install"!
Once it's installed, you'll need to activate the Add-on within Blender. To do this, open up the "Add-ons" tab in the Blender preferences, choose the "Scene" category, and click the checkbox next to "SpeckleBlender 2.0".
Adding a stream

The Speckle Connector tab will appear on the 3D viewport toolbar (N). From the "Streams" panel, you can either select an existing stream or press the "+" button to create a new one. Once you've selected or created a stream, it will appear in the "Active Stream" panel below.
Sending Geometry to Speckle

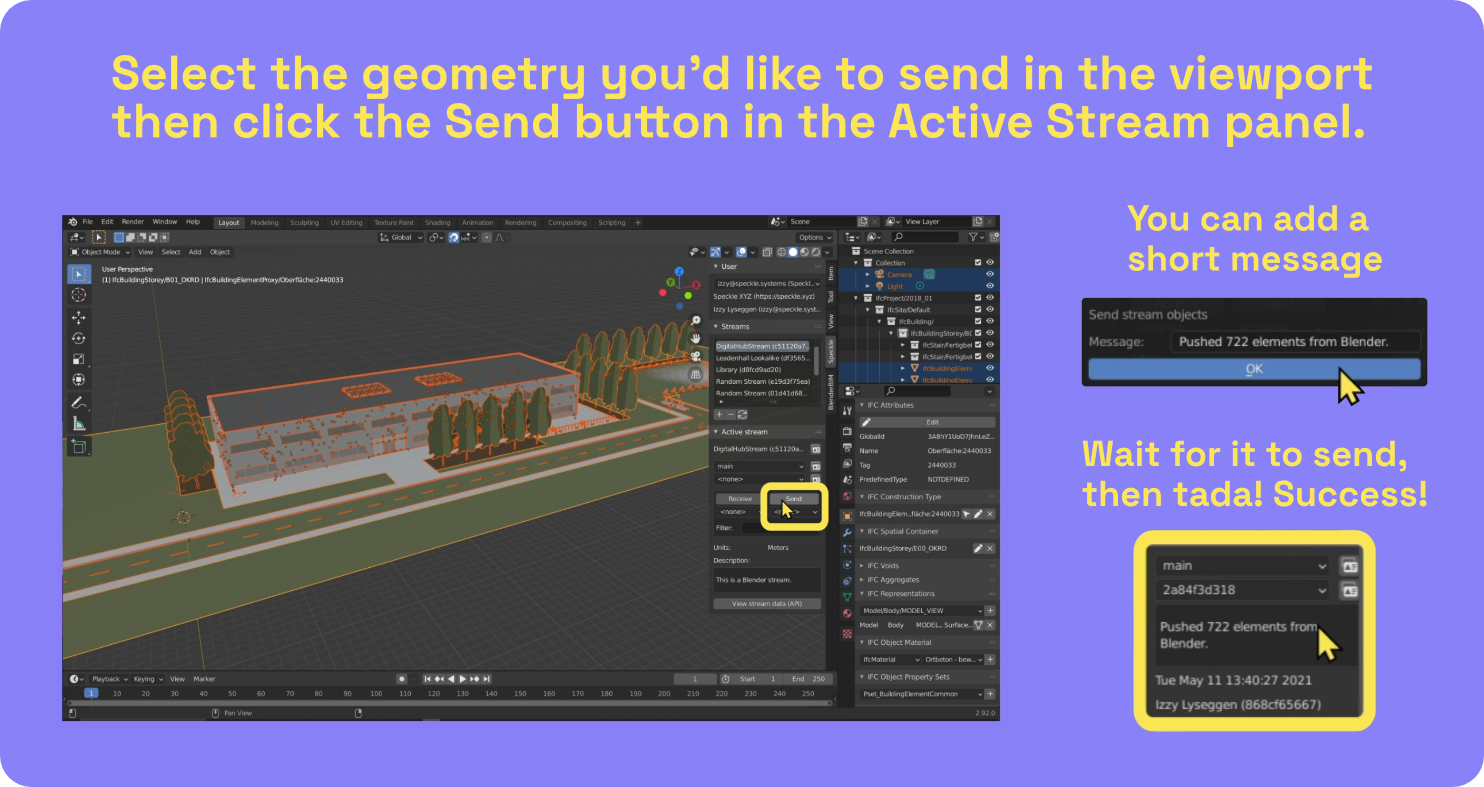
Sending geometry is as easy as clicking the "Send" button in the "Active Stream" panel. All objects you have selected in the viewport will be sent. Before you send, you'll have the option of adding a short message.
Any custom properties you've added to your objects will be included when sending.
Below you can see the results of sending the whole model 👇
Receiving Geometry in Blender

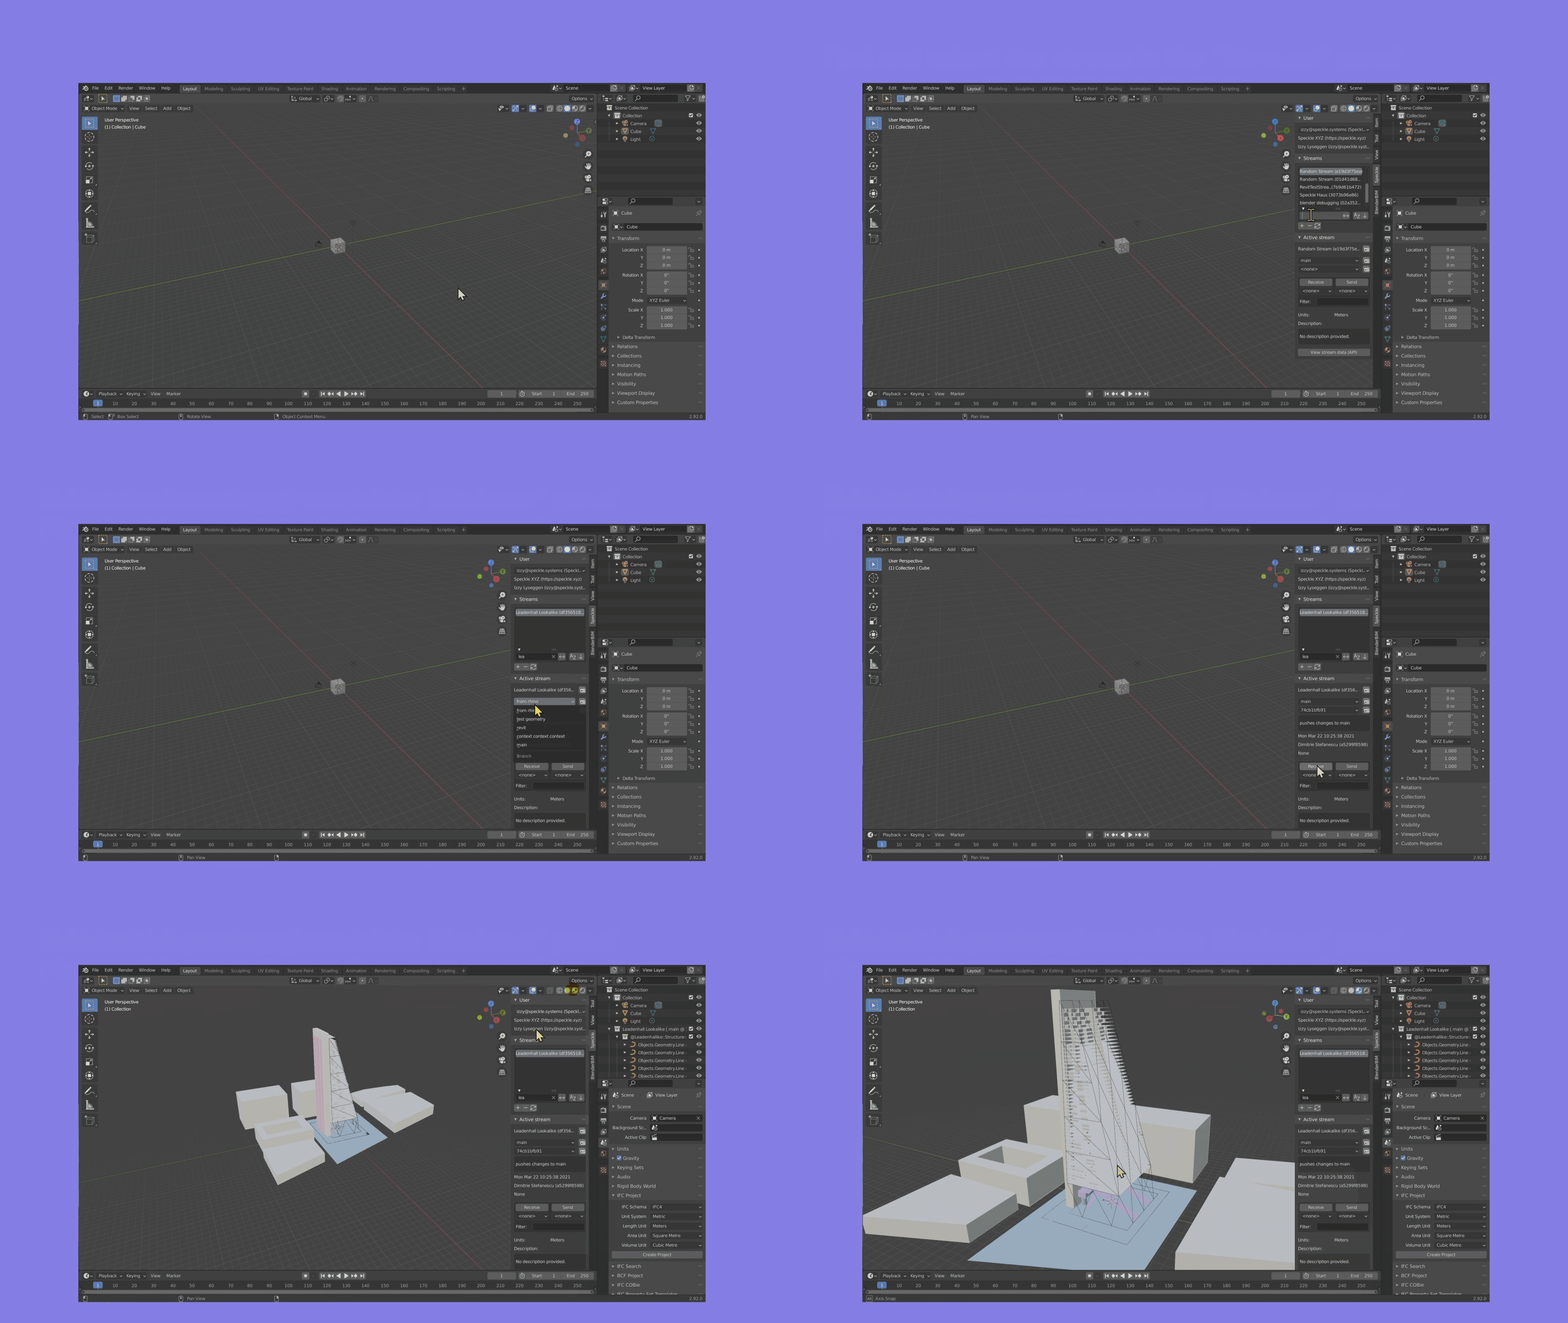
To receive the latest data from a stream, find and select it from the list then click the "Receive" button in the "Active Stream" panel.
If your stream has multiple branches, you can use the first dropdown in the "Active Stream" panel to switch to different branches. The second dropdown lets you switch between different commits on the selected branch.
Check out the model we've just received (from Rhino!) on the web below 👇
Conclusion
We hope you enjoyed this tutorial and found it useful!
Speckle is an Open Source project and we really ❤️ feedback, so if you have any questions, comments, critiques, or praises please let us know on our community forum.


