Overview
In this tutorial, we are going to create native Revit topography from Sketchup geometry and we'll be using Speckle to send data from Sketchup to Dynamo. Let's go 🚀!
Prefer watching? Here is a video 📽
Tutorial Files
You can download the Sketchup file and Dynamo definition used in this tutorial from here 👇:
Pre-requisites
To follow this tutorial you'll need the following:
- Speckle Account (you can get one for free🎉 at https://speckle.xyz/)
- 🔴 Skethup Connector (install it via Manager)
- 🟣 Dynamo Connector (install it via Manager)
Since we are using Sketchup and Dynamo to achieve this workflow, you need to have the basic knowledge of how to use both solutions😇.
Installing Connectors
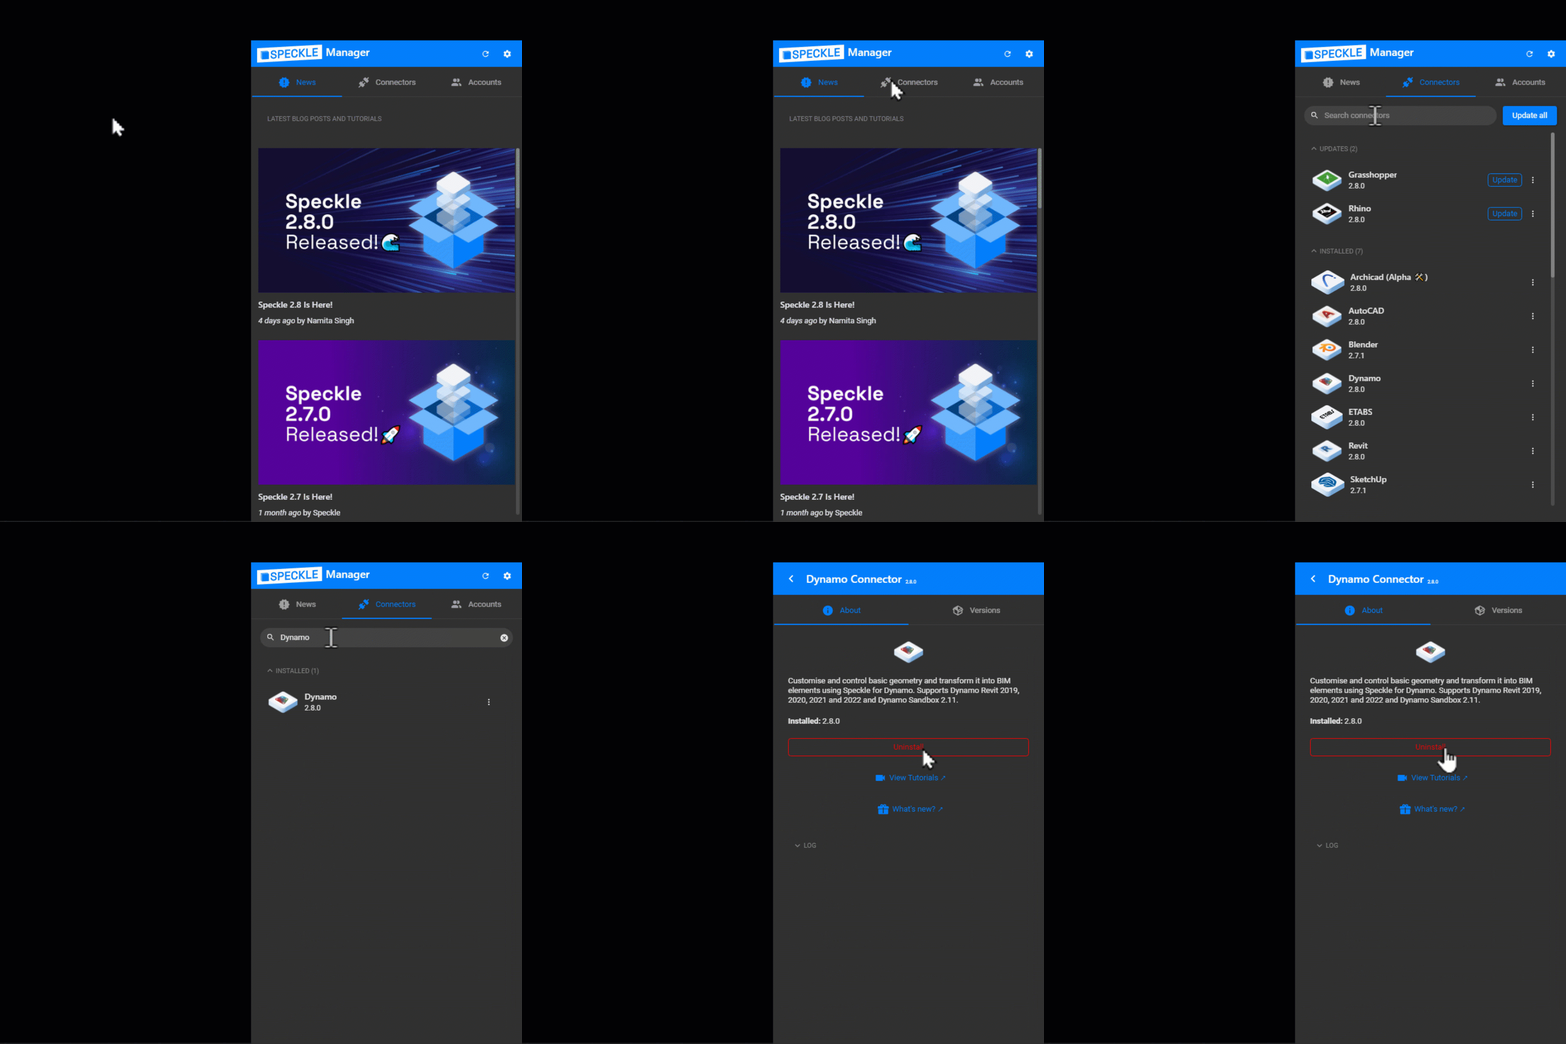
Installing connectors is the first step and it is as simple as finding them in the list of available connectors in Speckle Manager and clicking “Install”.
Sketchup Connector 🔴

Dynamo Connector
Sketchup
I’ve created this simple terrain using Artisan plugin for Sketchup. If you want to use this terrain, you can download it from above ☝.

- Lets start by opening the Speckle connector. You can do this by clicking the Speckle button on the toolbar.
- Once the UI panel is open, go ahead and select the
streamandbranchyou’d like to send data to. - Select the Terrain.
- Finally, press the
Sendbutton.
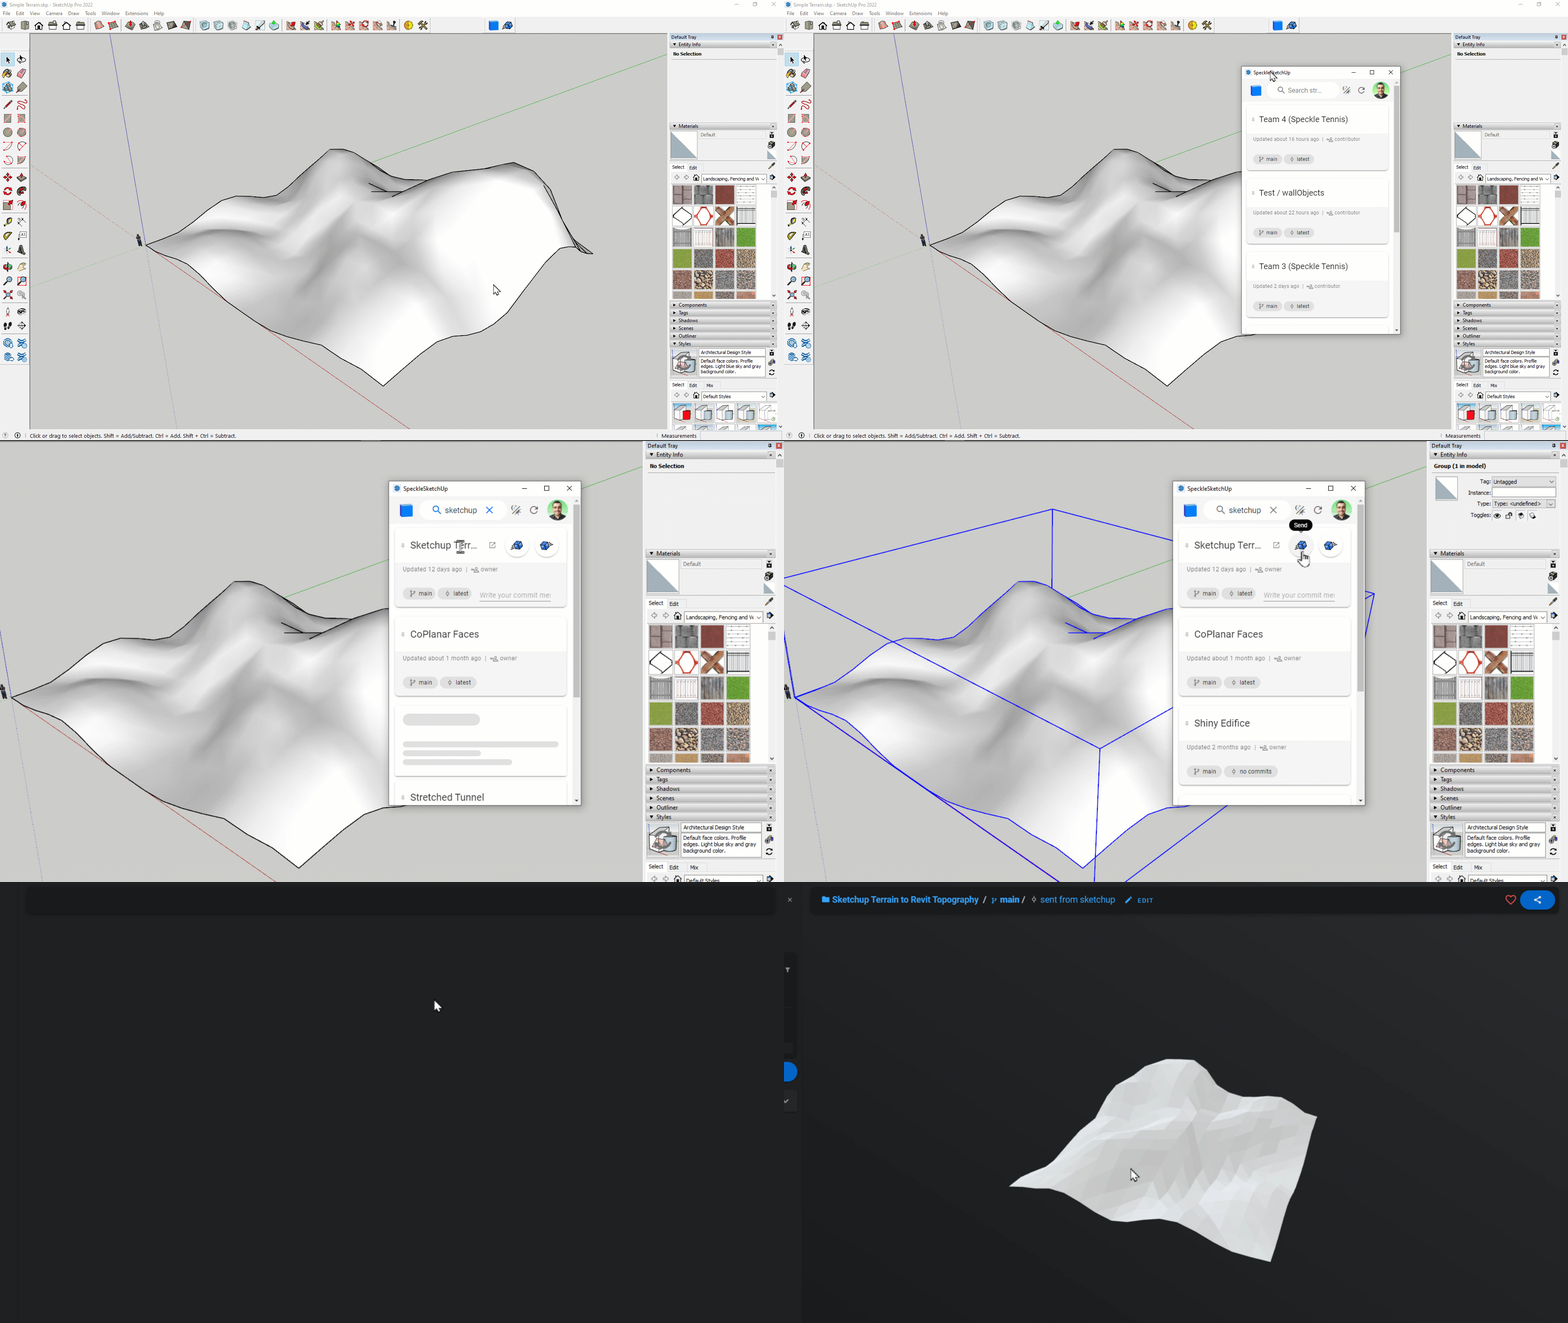
When sending is done, that geometry will now turn into a platform agnostic format. Meaning, you can use it on any platform you want. In this tutorial, we’ll create a Revit topography from it via Dynamo. Let’s do that in the following section!
Dynamo
Receiving Data from Speckleverse
- Copy the Stream URL from
Speckleverseand paste it into aStringnode in Dynamo. - Connect this URL into a
Receivenode. Once you click on the blue button🔵 onReceivenode, it will receive data from Speckle and convert it into a Dynamo compatible format.
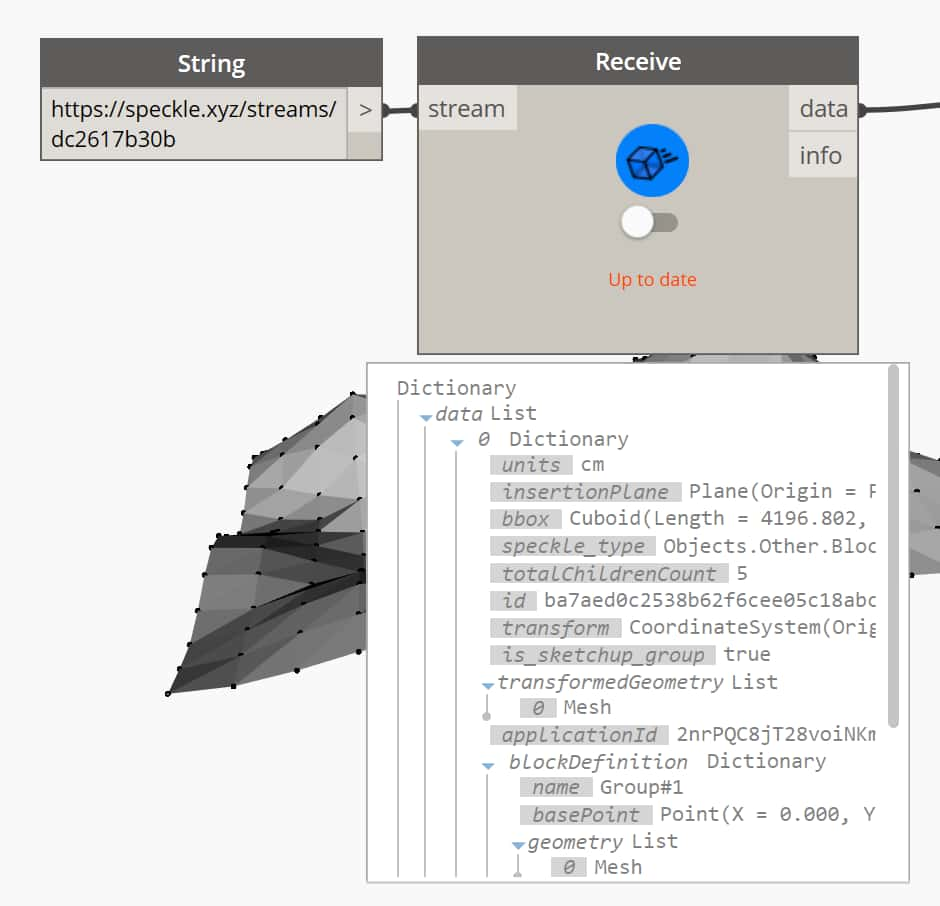
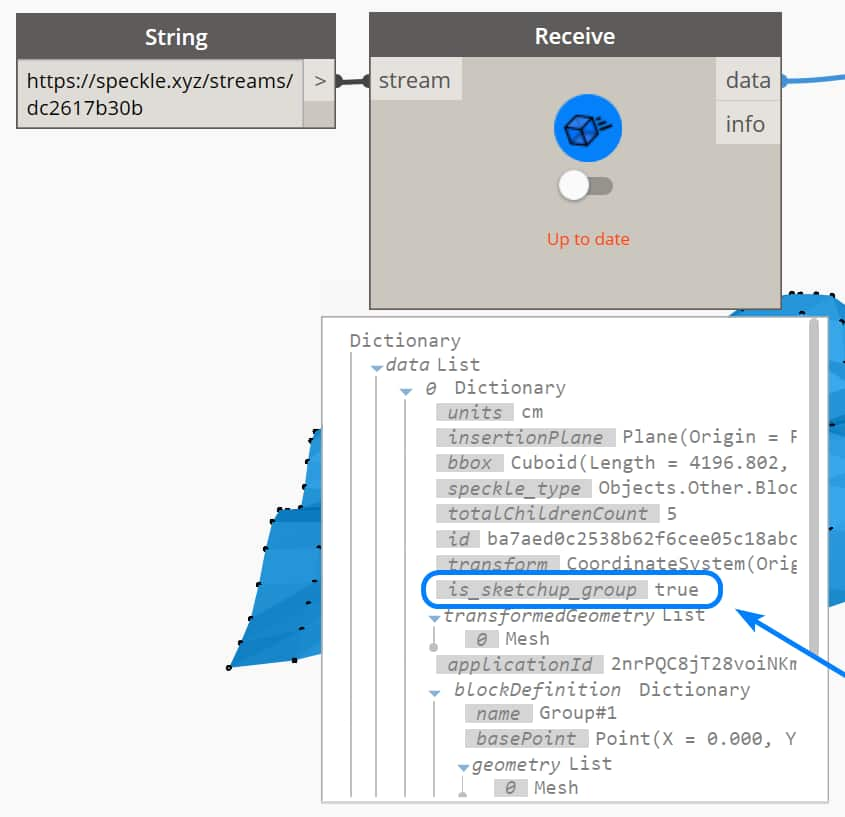
What you receive is a Dynamo Dictionary. You can get any key from this dictionary using a Code Block or Dictionary.ValueAtKey nodes. We will use Code Block.
- When we examine the data received, we can see that there is a key called
is_sketchup_groupand its value istrue. We received a sketchup group and this can be confirmed from this dictionary.
Access Geometry from Received Data
If you are wondering how we can access the geometry of this sketchup group, another key will catch your attention: transformedGeometry. Using this key we can access the transformed geometry of elements within this block/group. The geometry obtained in this case is a mesh.
- We will use a
Code Blockto access the geometry. Simply write the name of the key in square brackets right next to variable name and connect your data as the input. In this case, we will type in:data[”transformedGeometry”].datarepresents the data received from Speckle andtransformedGeometryis the key we want to access.
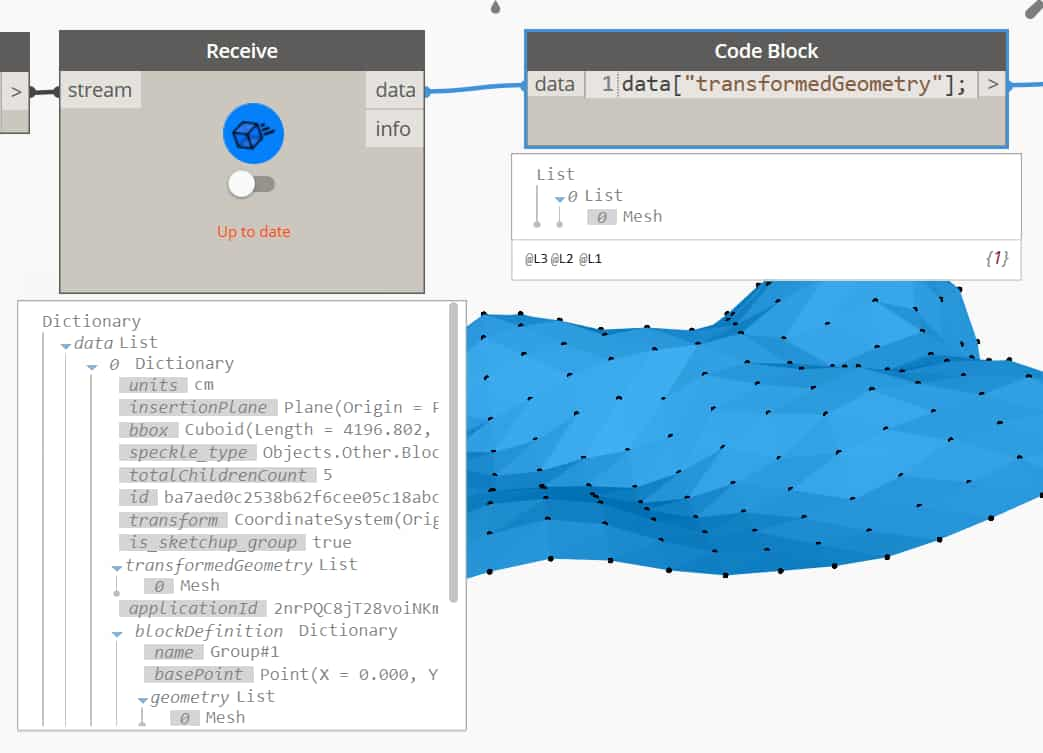
Remember, what you receive is a Dynamo dictionary, it will behave like any other Dynamo dictionary.
Create Topography from Mesh
In the previous step, we got a mesh geometry as output. We ill use Topography.ByPoints node to create a topography from this mesh. This node expects list of points as an input. So lets get the vertex points from this mesh🏃♂️.
Mesh.VertexPositionsnode will output the vertex points as a list.- But multiple faces can share same vertex positions. We need unique items from this list and we’ll get that using
List.UniqueItems.
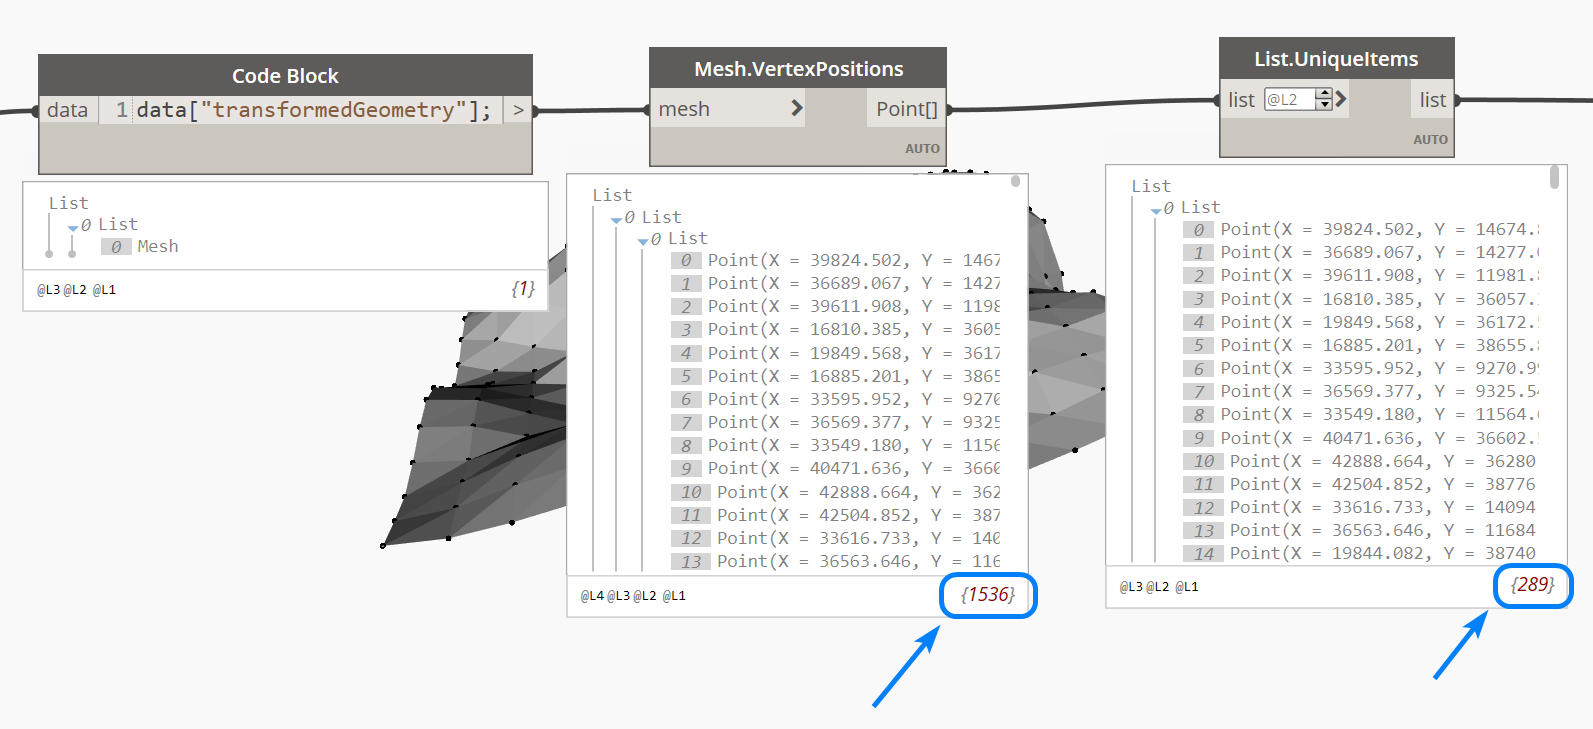
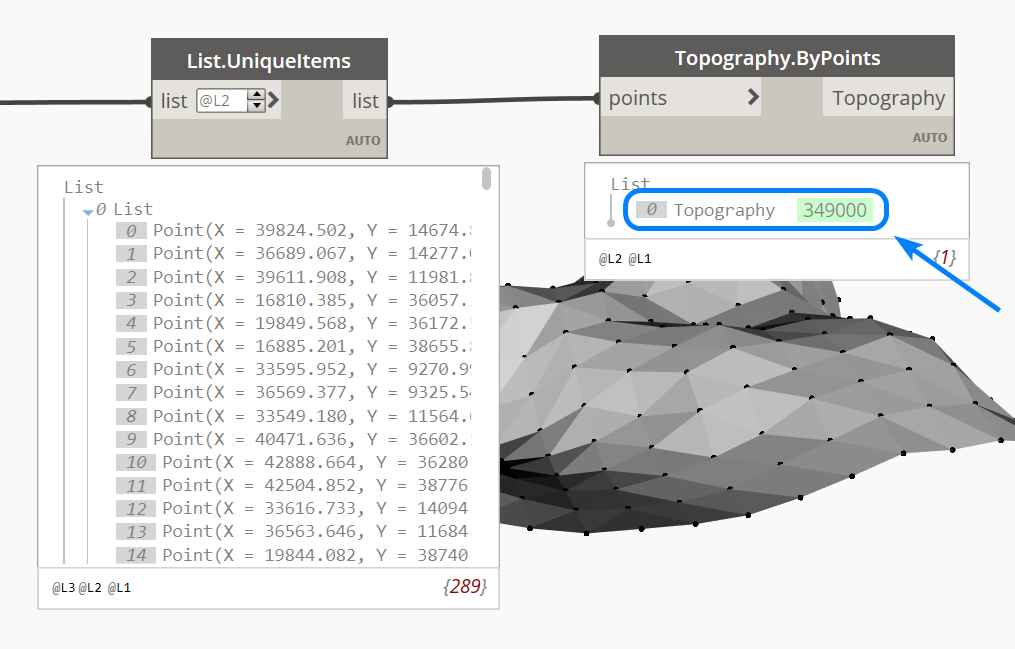
- Let’s connect these points as input for
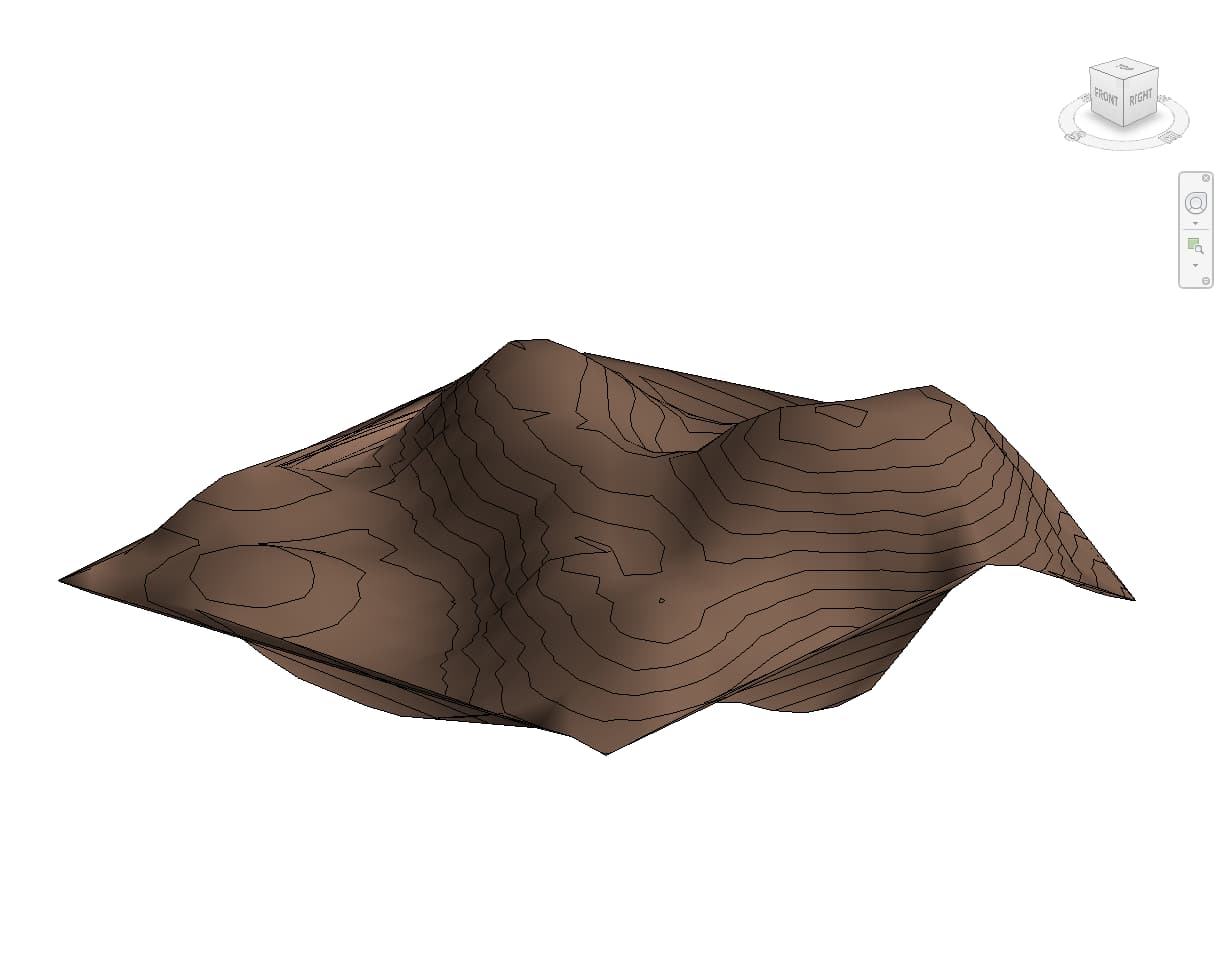
Topography.ByPointsnode. - Ta da🎉🎉. You will get a Revit topography as output. Take a look👀!
Conclusion
We hope you enjoyed this tutorial and found it useful!
Speckle is an Open Source project and we really ❤️ feedback, so if you have any questions, comments, critiques, or praises please let us know on our community forum.
Curious about Speckle?
🚀 Give it a try!
- Getting Started → https://speckle.systems/getstarted/
- Community → https://speckle.community
- Docs → https://speckle.guide

